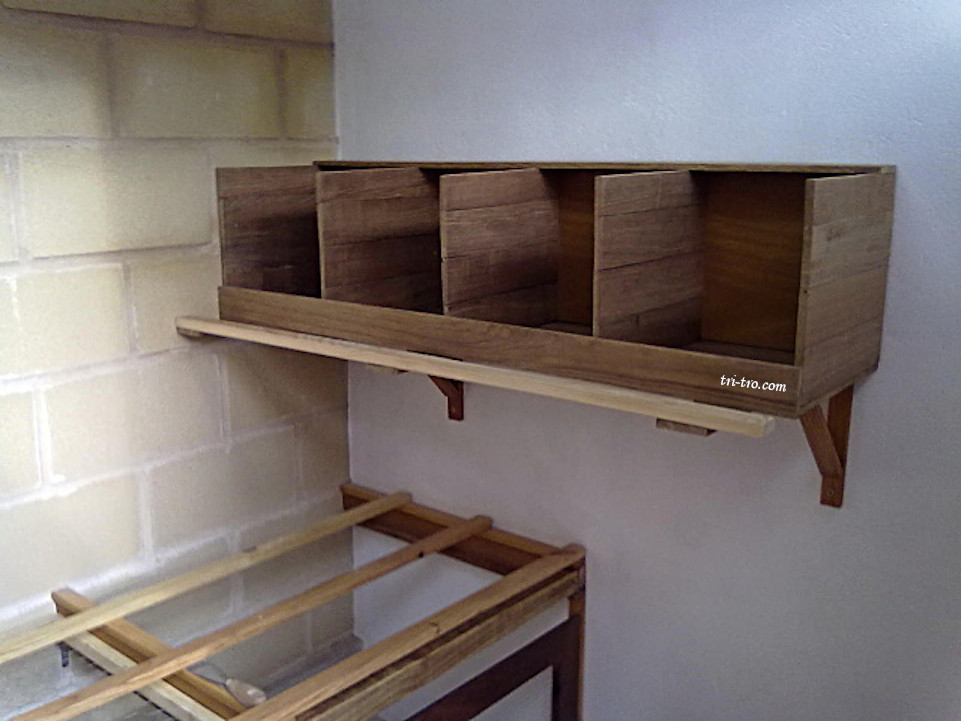
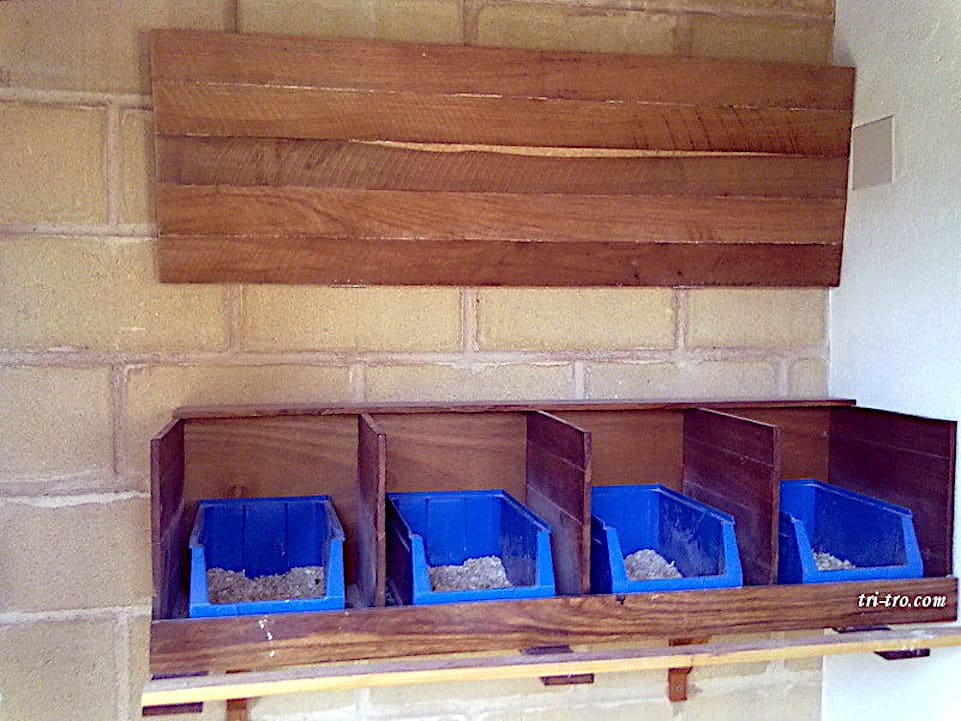
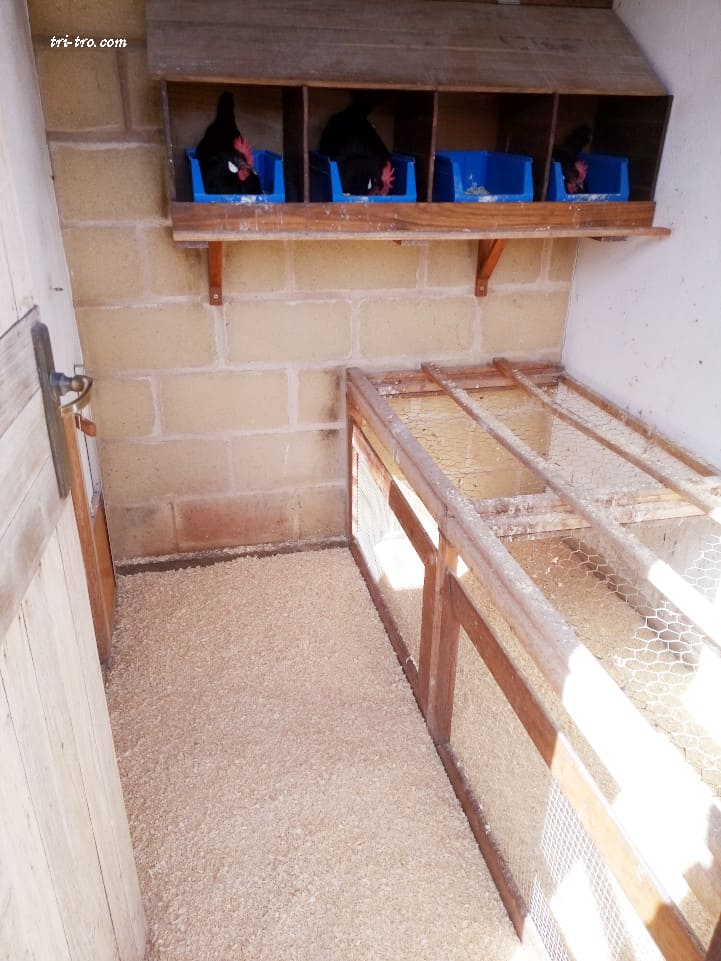
Layout and construction of a group de cuatro ponederos de madera, sobre un banquillo o plataforma, que les sirve de soporte común. Este formato que aquí os presento ya fue ideado y utilizado por uno de nuestros ancestros de la avicultura española en 1937, por don Ramón J. Crespo, y hay que tener en cuenta que lo antiguo está muy pensado y revisado para que funcione.
Por eso me he guiado por él y ahora que están finalizados los tres que he hecho para mis Chicken coops, me quito el sombrero de lo bien que quedan y lo prácticos que son para poder hacer su limpieza, cosa que es muy importante para tener controlados a los ácaros.
Materials:
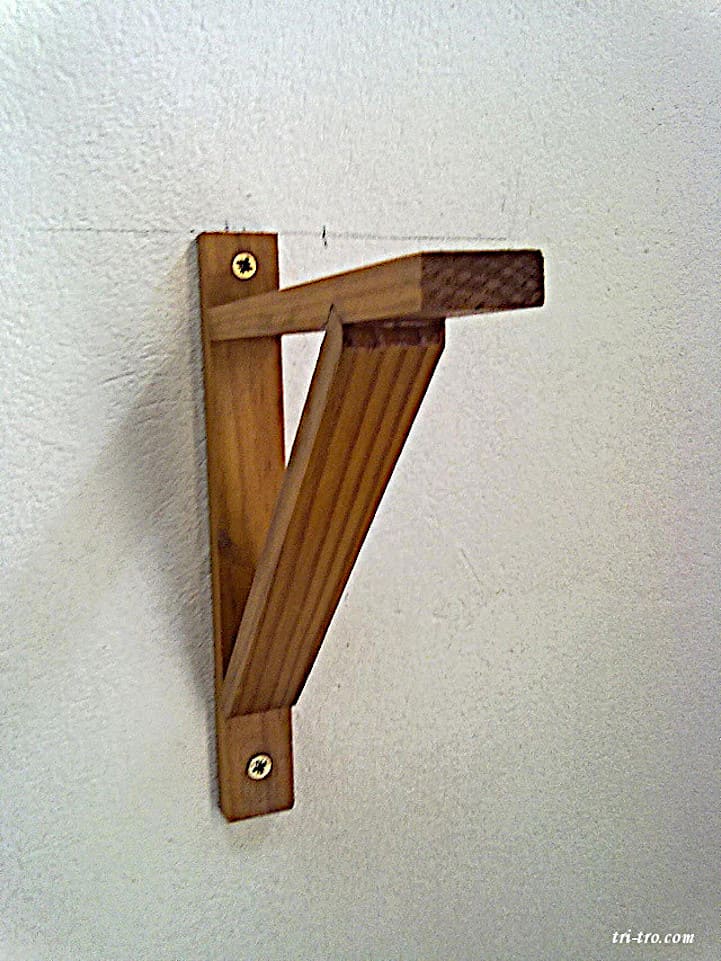
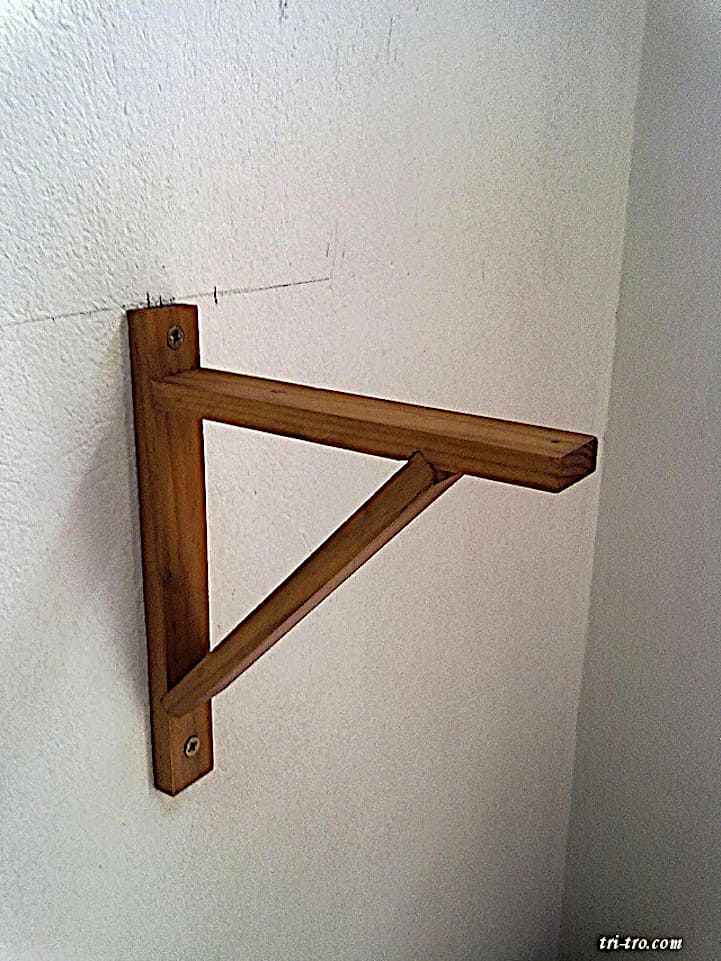
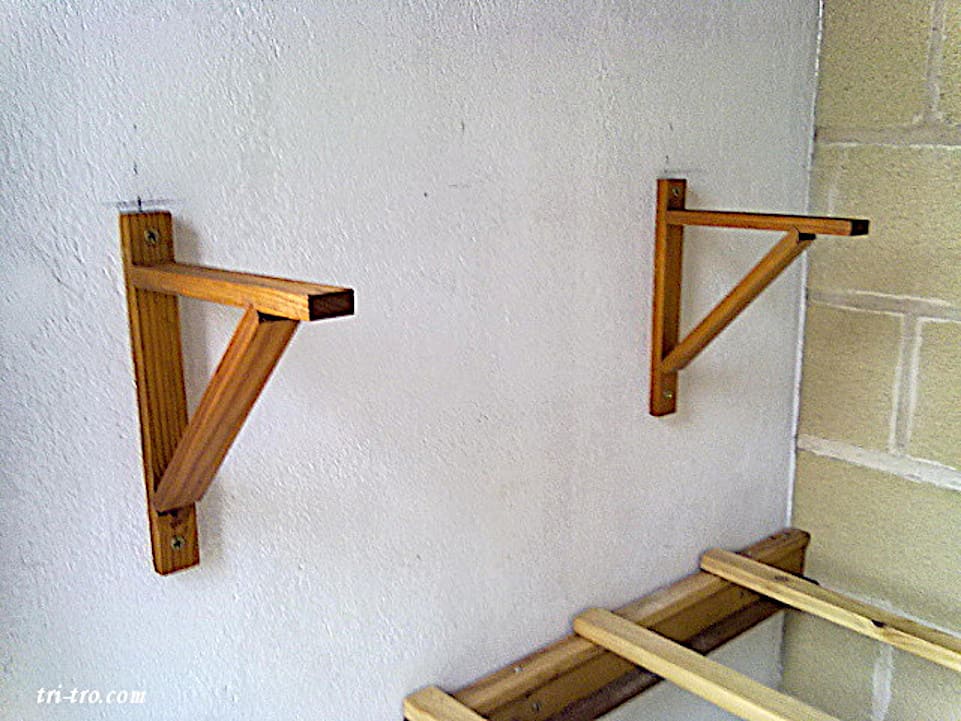
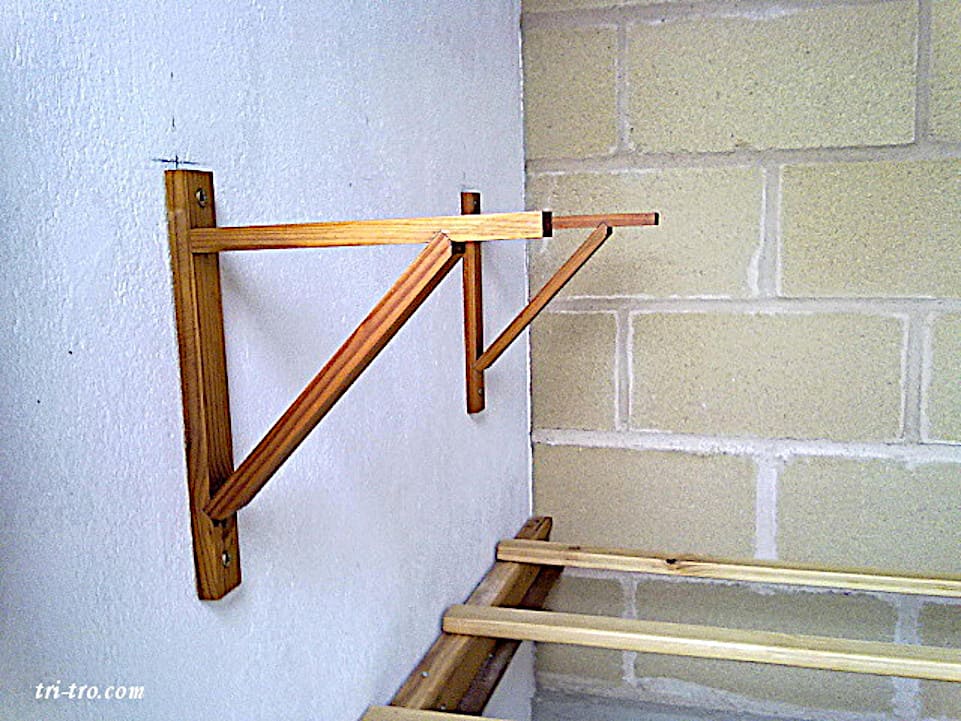
To- Wood supports in the form of a square of 30 cm, bolted to the wall.
B- Tabla de 30,5 cm de ancho por 125 cm de largo, que formará el fondo de los nidales.
C- Headwalls or divisions made with planks of 1 cm thick by 30 cm wide and 30 cm high.
Todo esto lo podéis cambiar según las necesidades que tengáis en vuestros gallineros; yo los que he hecho son de 4 divisiones y les he agregado un asidero y algún cambio más. Lo explico en los siguientes apartados y con las fotos quedará más claro.
These supports, we have settings in angle, must be made with precision, that is to say, they must have the slots on both sides for bonding and adhesion.
To ensure that they are perfectly horizontal and aligned, it is necessary to use a straightedge, a level, a tape measure and a pencil to make the marks on the wall.
I have established a distance of 60 cm from perches where they spend the night, to the chickens until the part of the bracket that will hold the base of the nesting boxes.
The screws that I used are inserted in tacos 8 cm; you must use a screw robust, as shown in the image, and the screw, it is essential that the taco not turn. To avoid this problem, you must perform the holes with care using a drill, as this is crucial so that the brackets can adequately support the structures that will be placed later.
For the installation of four nests, are sufficient to two squares; if you want to add a fifth ponedero, it will be necessary to include a squad further.
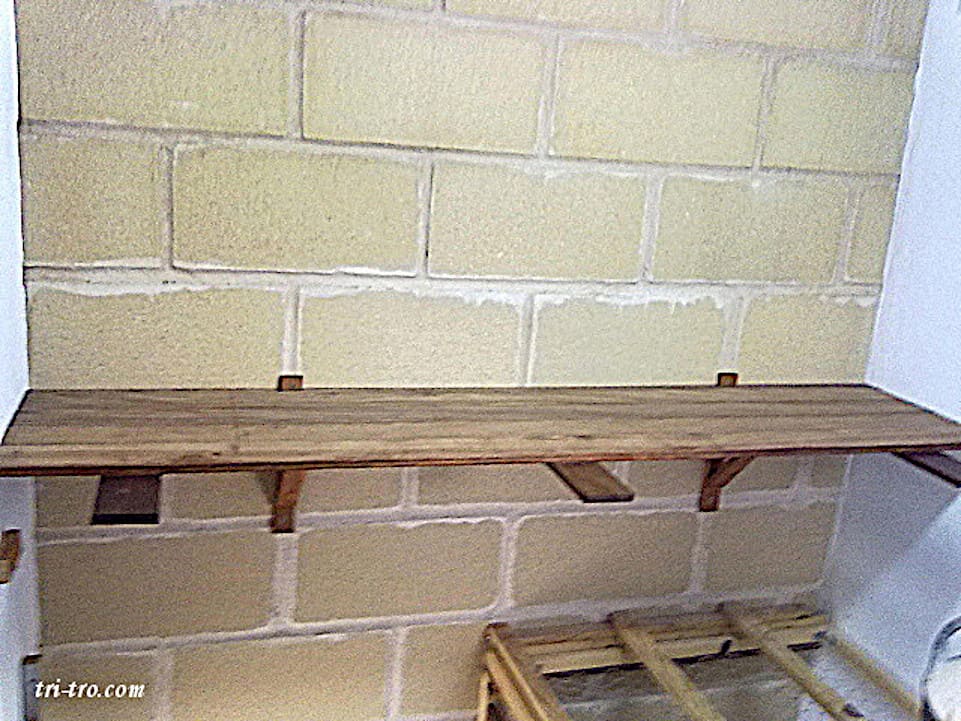
Ya colocados los soportes de escuadras promediados, the space that we're missing, we prepare the table that will form the bottom of the nesting boxes.
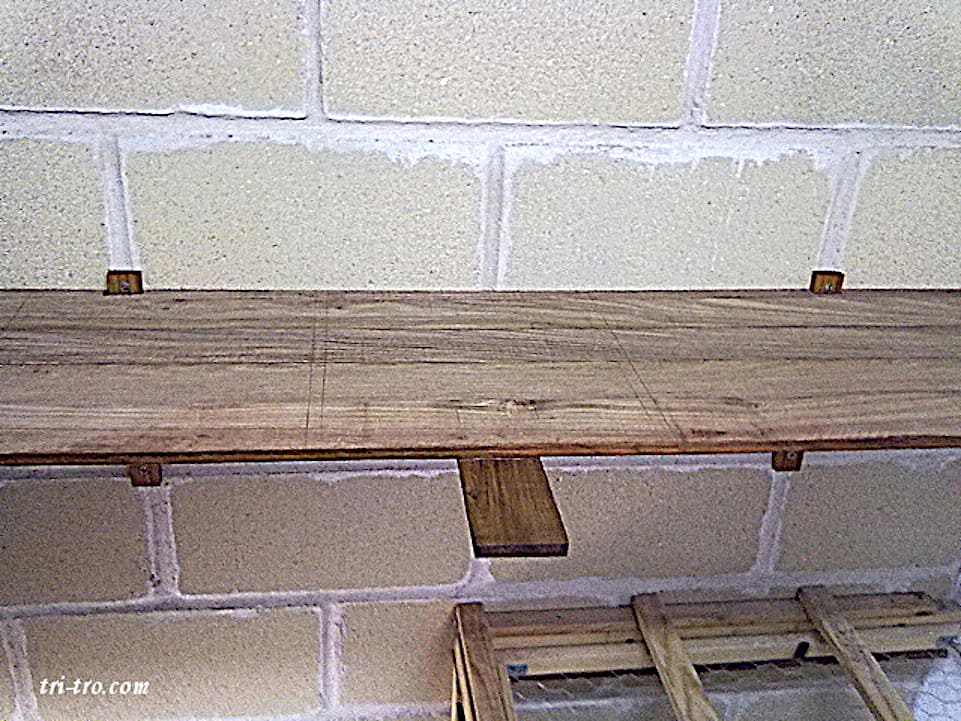
Tenemos que hacerle un rebaje por la parte de atrás donde salen las escuadras; para ello, colocamos encima la tabla, la sujetamos para que no se nos mueva a la hora de marcar, con un par de sargentos y con un lapicero marcamos en el soporte donde tenemos que hacer el corte.
Con el metro medimos cuánta profundidad nos hace falta; esto que parece muy sencillo hay que hacerlo al milímetro para que encaje perfectamente (después del corte con la caladora, con una lima de madera ajustamos) para que no nos quede junta abierta, porque sería un sitio fabuloso, en especial para el citrus red mite.
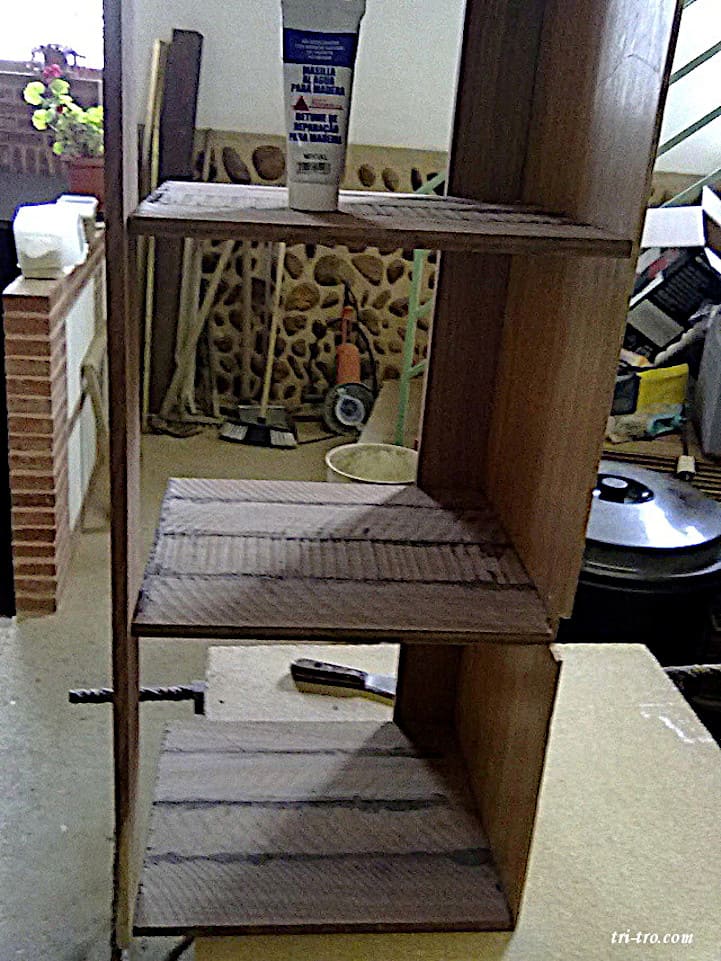
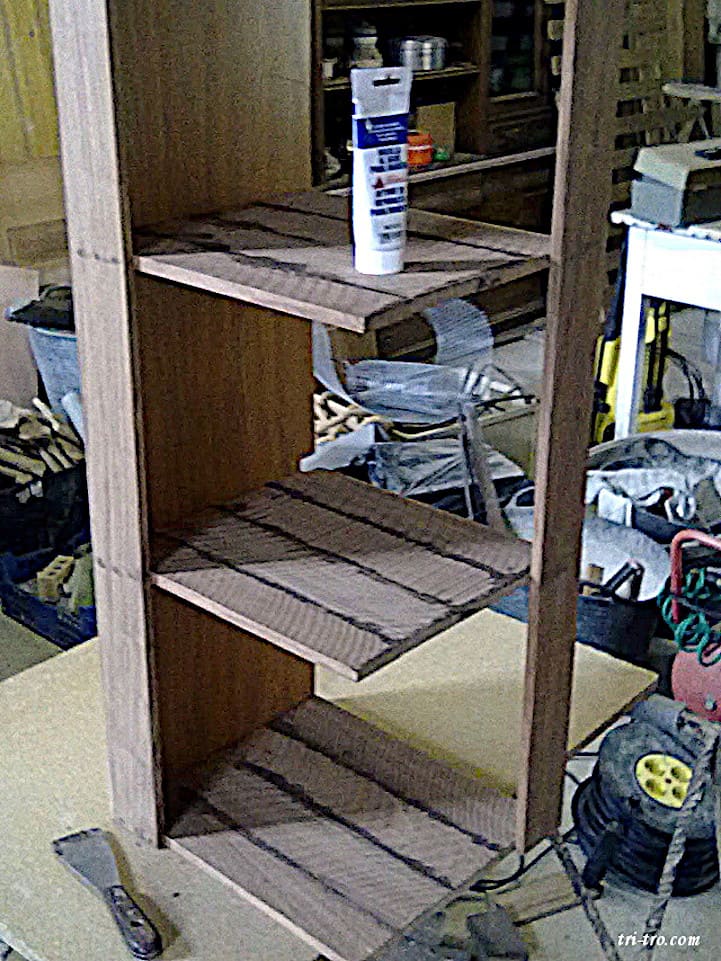
En la foto, si os fijáis, yo he agregado otras tres tablas por la parte de abajo, promediadas y atornilladas al soporte con tornillos de acero de 1,5 cm, pues he utilizado madera de 1 cm muy dura que he tenido que pretaladrar con broca fina antes.
To be able to put the screws (depending on the thickness and type of wood that you put, increase the size of the screw) in the wood and put a bar aseladero, after, all three of these tables have that protrude from 12 to 14 cm, that to taste.
Bien, ahora, antes de seguir, tenemos que preparar en el fondo de los nidales para la pared; yo lo he hecho de ocume de 0,5 cm de espesor, y en él también tenemos que marcar para hacer un rebaje salvando las dos escuadras.
Para que nos quede perfectamente encima del soporte, esta pieza hay que hacerla bien, pues luego es la que hará anclaje para los nidales finalizados. Cuando la tengamos cortada y bien ajustada, la guardamos hasta finalizar el montaje.
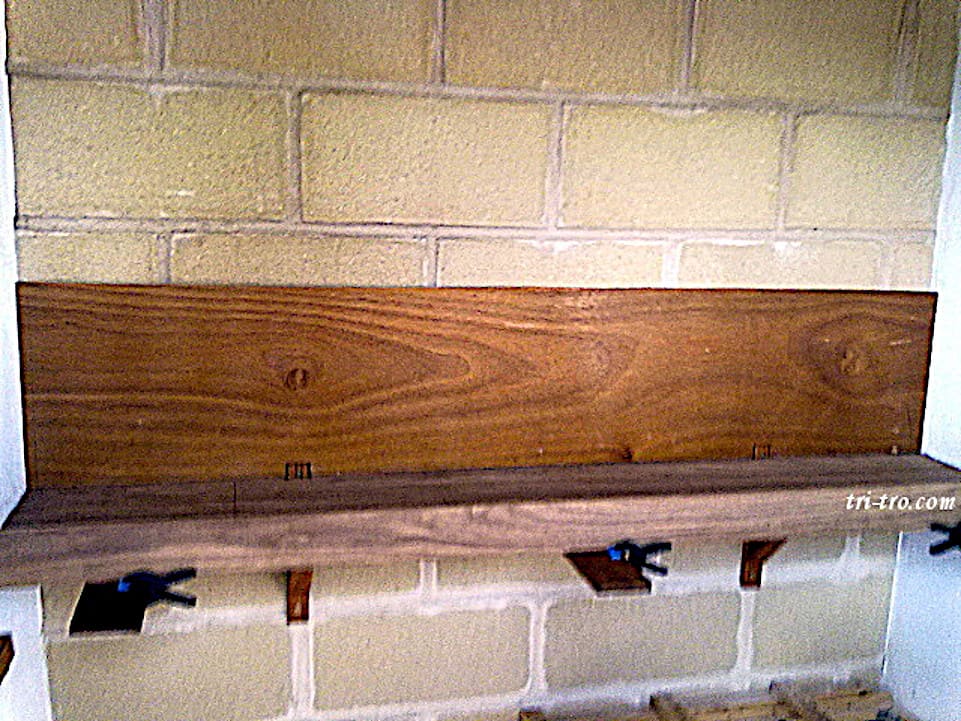
Estos 0,5 cm del ocume me hacen que las divisiones queden a ras del soporte, después de que clavemos el mismo al final, y me servirán para poner la tabla delantera de entrada al interior de los nidales, que quedará encima de las tres tablas soporte del aseladero, haciendo cuña todo el conjunto (en la foto se aprecia el ocume encima del soporte y la tabla delantera presentada encima de las tres tablas del aseladero). Si utilizáis maderas más gruesas, tendréis que promediar el soporte, es decir, añadir 1 o los centímetros a mayores, así como la altura de la tabla delantera.
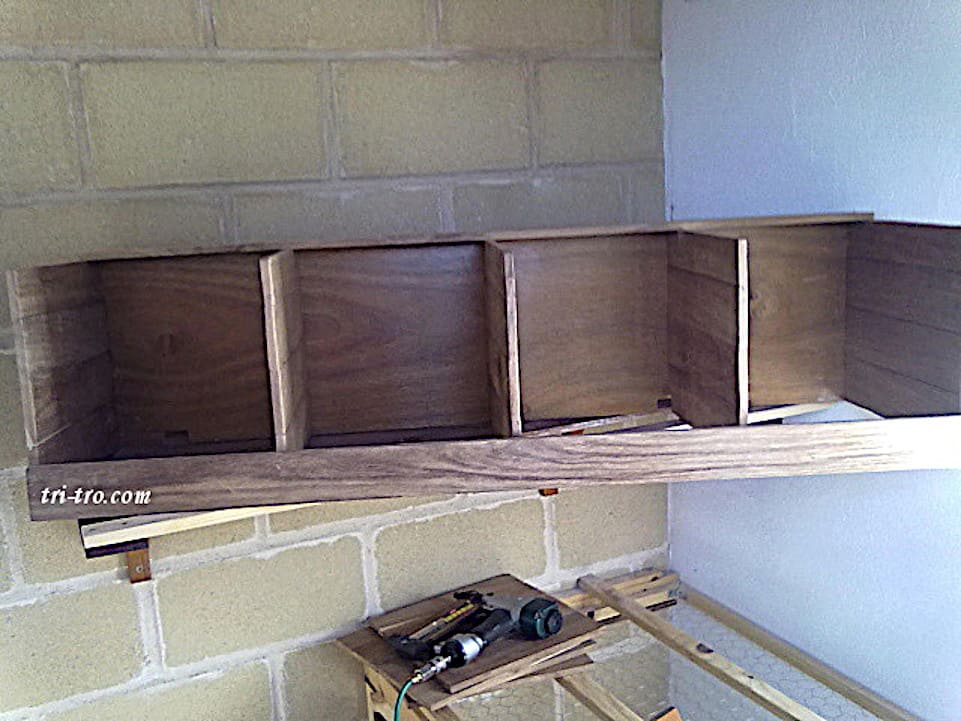
Ya en el soporte, en la foto se aprecia que he marcado con lapicero las divisiones futuras, descontando 1 cm del grosor de la madera divisoria, dejando un espacio de 30 a 30,5 cm interior; esto nos ayudará mucho para después hacer el premontaje.
In the other photo, is already placed the aseladero pine wood 2.5 inches thick and a width of 5 cm, long, ask us, well beveled and sanded on all sides and edges, and nailed or screwed to the three tables of the support.

We've already marked on the bracket the future sections of the nesting boxes. Previously, we have prepared and cut five sections of 30 by 30 centimeters. In my case, because I use planks of machihembrar, I have pasted previously. Subsequently, after adding the missing parts, I have attached a few sergeants and I've placed a weight on top to prevent any deformation or torsion. In this way, the next day, will be ready for use.
If you utilize boards of pine wood, the only thing that you should do is take the measurements and cuts with precision so that they are as accurate as possible.
We put the divisions with the Ocume without spiking, and we do an average, scoring on him (Ocume) as well as in the wood front.
Promediamos the splits, this is five holes, I have done it four
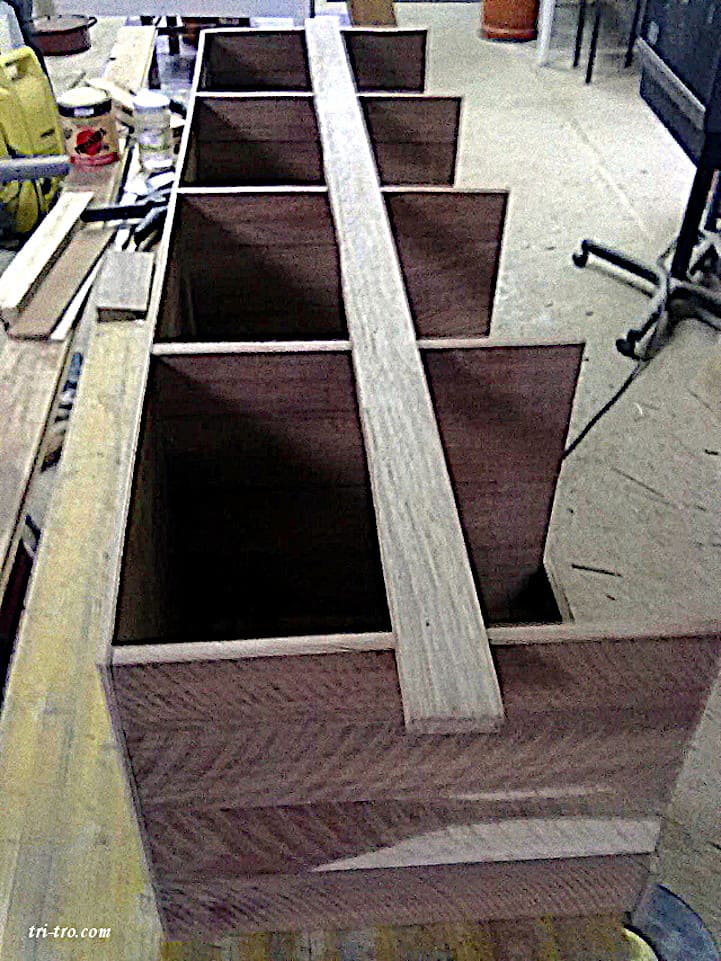
To set the divisions, utilizaremos una tabla que luego descartaremos. La colocamos en posición horizontal en el centro y, con una grapadora previamente preparada, comenzamos por los extremos. Con la asistencia de una escuadra, fijamos la primera pieza, asegurándonos de que esté completamente vertical.
Colocamos la tabla que hemos preparado y realizamos el clavado, asegurándonos de colocar un mínimo de dos clavos, ya que de lo contrario, al levantarla, podría moverse. A continuación, repetimos el proceso en el lado opuesto. Una vez que ambas piezas laterales estén firmemente sujetadas a la tabla guía, que posteriormente será retirada, hacemos lo mismo utilizando las marcas realizadas con un lápiz, siempre empleando la escuadra en ambos lados, tanto en la parte delantera como en la trasera.
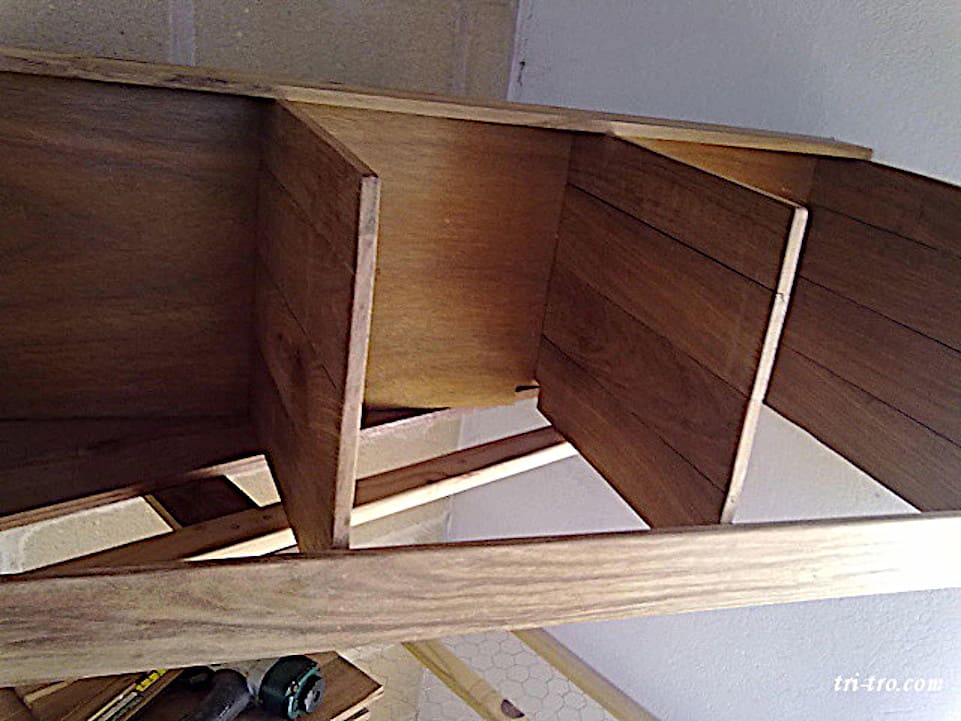
When all the divisions are fixed to the guide table, install the front piece, which will have a height of 8 or 10 cm and a length of 125 cm or to the extent required. This will nail the proper way, making sure that only the corners of the divisions are fixed and do not support.
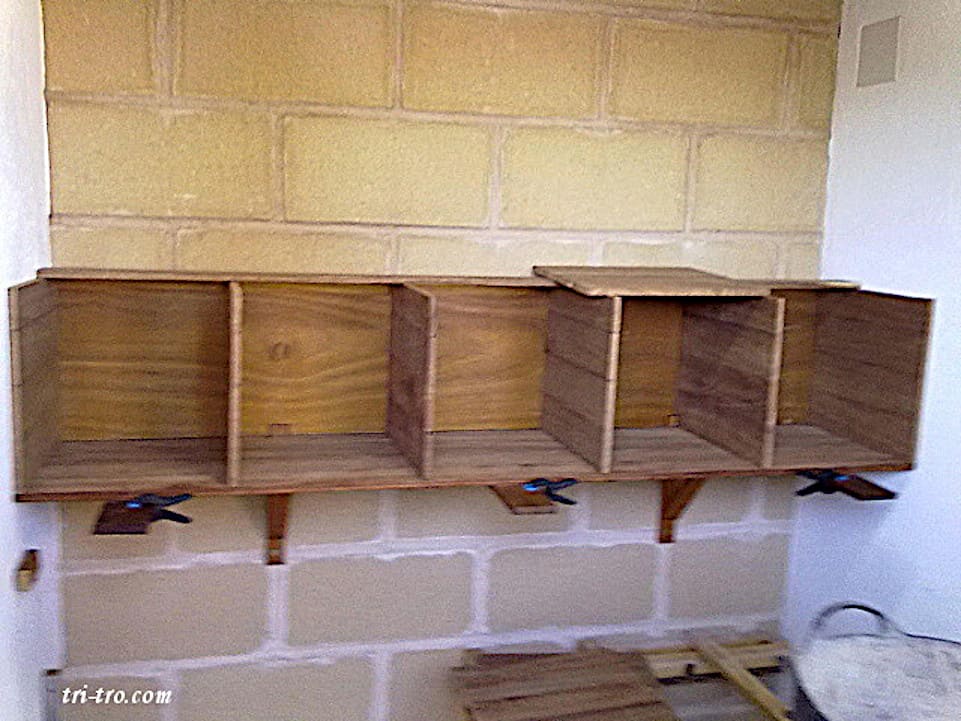
Once you complete this task, as can be seen in the photographs, we pick up with care, the structure, and it is located in an area destined to make the fastening at the rear, using the ocume or the wood that we had booked.
During this procedure, there is the option of doing it with the naked eye or, alternatively, to transfer the dimensions to the rear to carry out the fixation on the edges of the divisions. This is the choice of everyone, but it is essential that any tip protrudes toward the inside of the nesting boxes.
Finally, we set up the table of 8 cm wide at the upper back, making sure that it aligns with the ocume, securing it properly to the edges of the divisions of the nesting boxes. Then, we removed the table that we use as a guide.
La estructura ya está ensamblada. Ahora procede a cubrir todas las fisuras, lijar cualquier superficie áspera y aplicar un barniz en al menos dos capas.
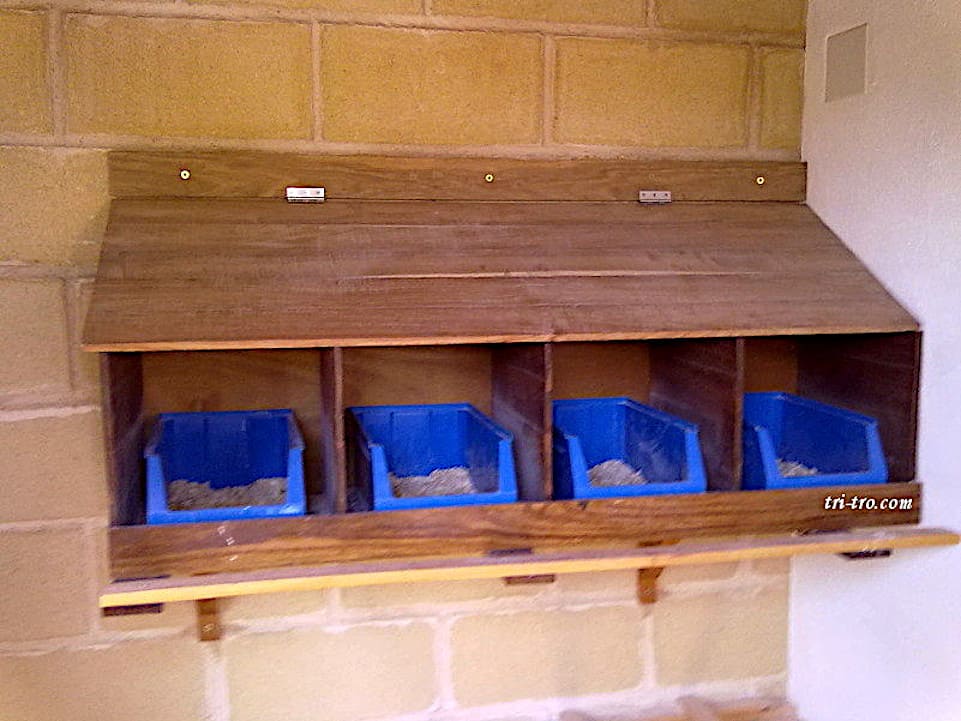
Y aquí tenemos el resultado concluido: the nesting boxes that we have created can be lifted without difficulty when it is necessary to clean them or to verify the presence of pest mites. Can be removed from the chicken coop to be washed or receive the required maintenance.
A relevant aspect to consider is that the wood used is of a dark color. I this: if we use pine or light woods, it will be essential to apply a stain or a lacquer dark color, such as mahogany or rosewood, among others.
The reason for this choice is that our cherished hens prefer dark environments. Since there are no tables in the upper part, the use of dark wood provides the sensations necessary for you to feel calm.
I trust that this information will be useful to you, or at least find some ideas for to carry out their own projects.
Si nos enfrentamos al inconveniente de que nuestras gallinas logran subirse, estamos hablando de una superficie de un centímetro de grosor; podemos diseñar una tapa de madera que cuente con una inclinación apropiada, lo que evitará que las aves se posen sobre ella.
Then calculate the height necessary to ensure that the cap has the inclination, and our hens may not be sustained in it, you must install a cleat on the wall using three screws along with their respective screws, and incorporate two hinges that are provided for the connection with the cap.
When it is necessary to clean nesting boxes knockdown, to raise the lid, we can hold it up against the wall with any available means, such as a screw, a clamp, or a string, allowing us to perform the cleaning in an effective way.
It is recommended to place in each nested containers (such as those used for tools, which can be found at home improvement stores in different sizes and are low cost), similar to those of the image, we will facilitate the observation and the control of external parasites that affect our hens, and the cleaning is very simple and fast.
Sugiero agregar viruta dentro de la caja y esparcir diatomea en el fondo. Tras colocar un poco de viruta en la parte superior, será la gallina la que se encargue de mezclarlo; así lograremos mantener a raya a uno de los parásitos más problemáticos, el ácaro rojo, así como a las pulgas de gallina y otros que representan menor riesgo.
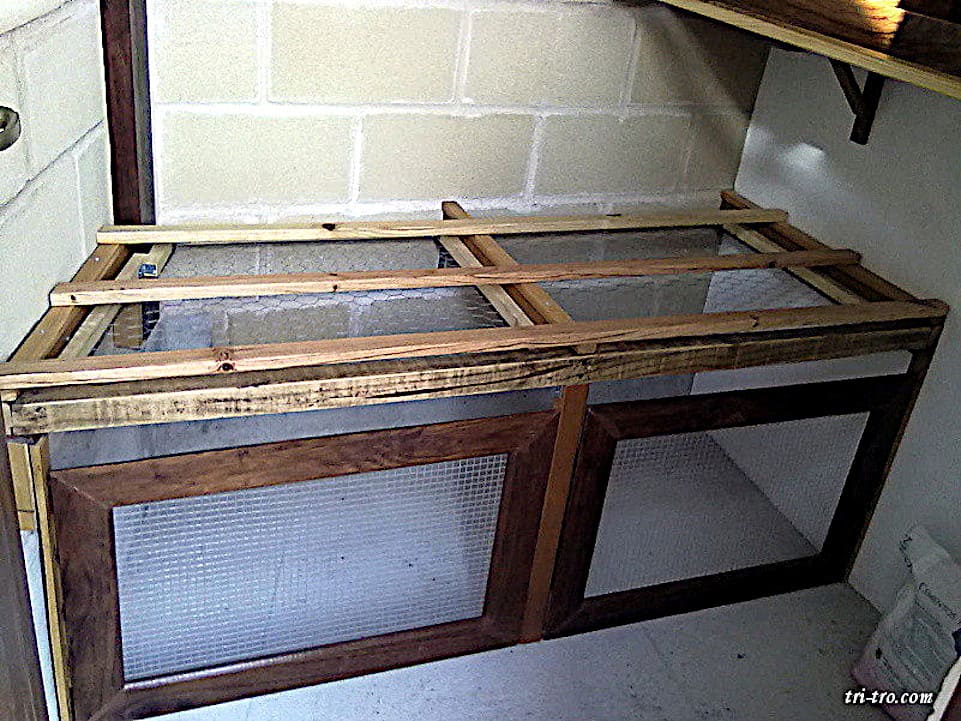
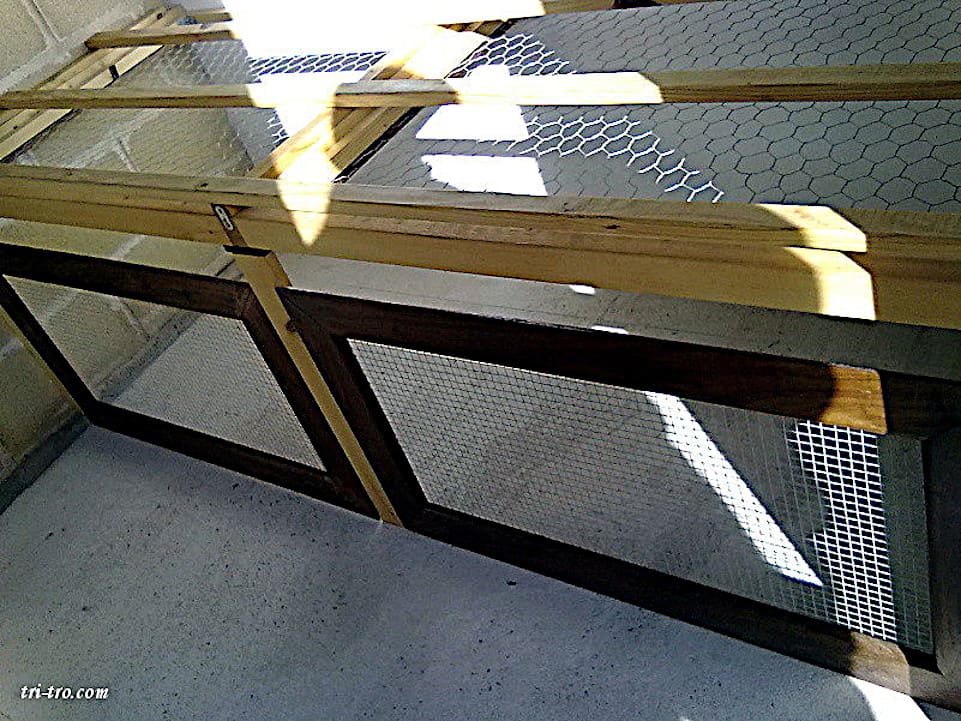
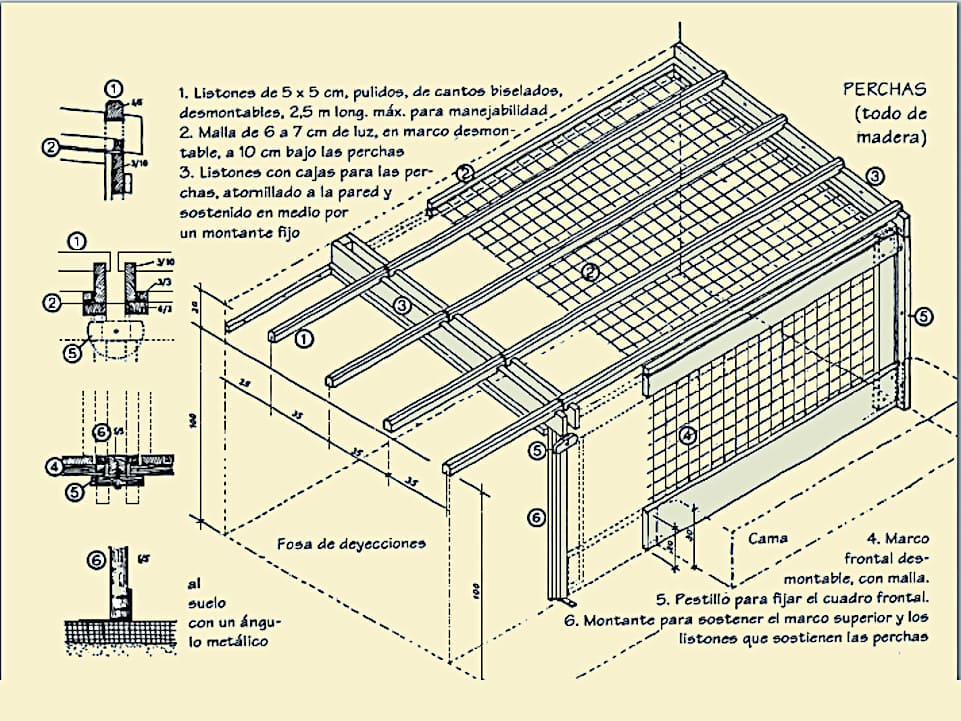
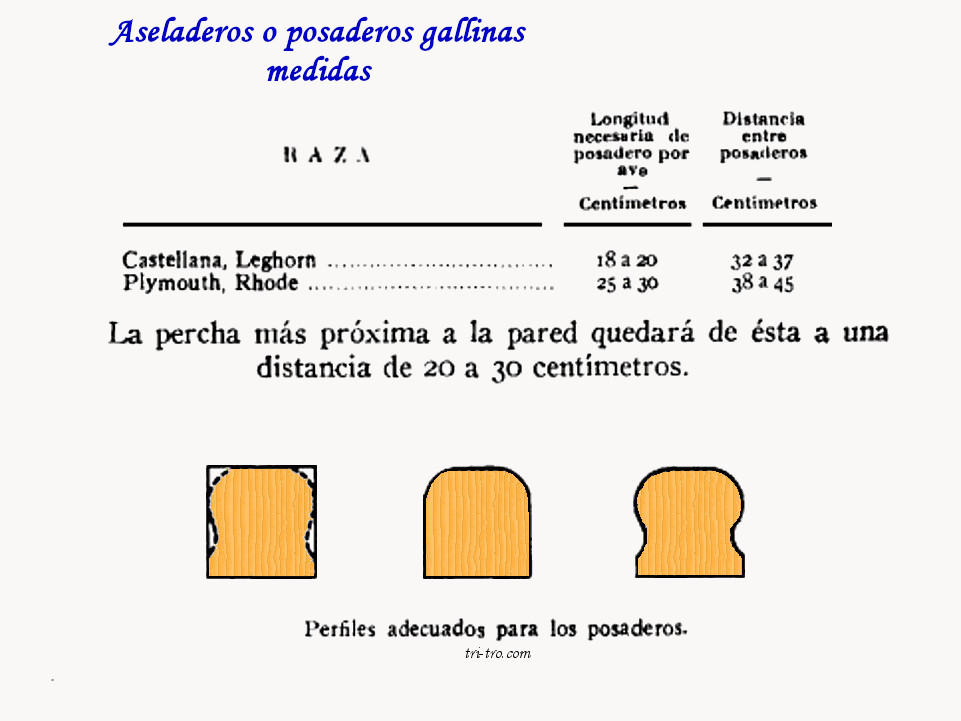
Perches, innkeepers or hangers are the places where the chickens a rest, sleep, and defecate. I have relied on an ancient document that appears in the picture to their construction, incorporating a number of innovations.
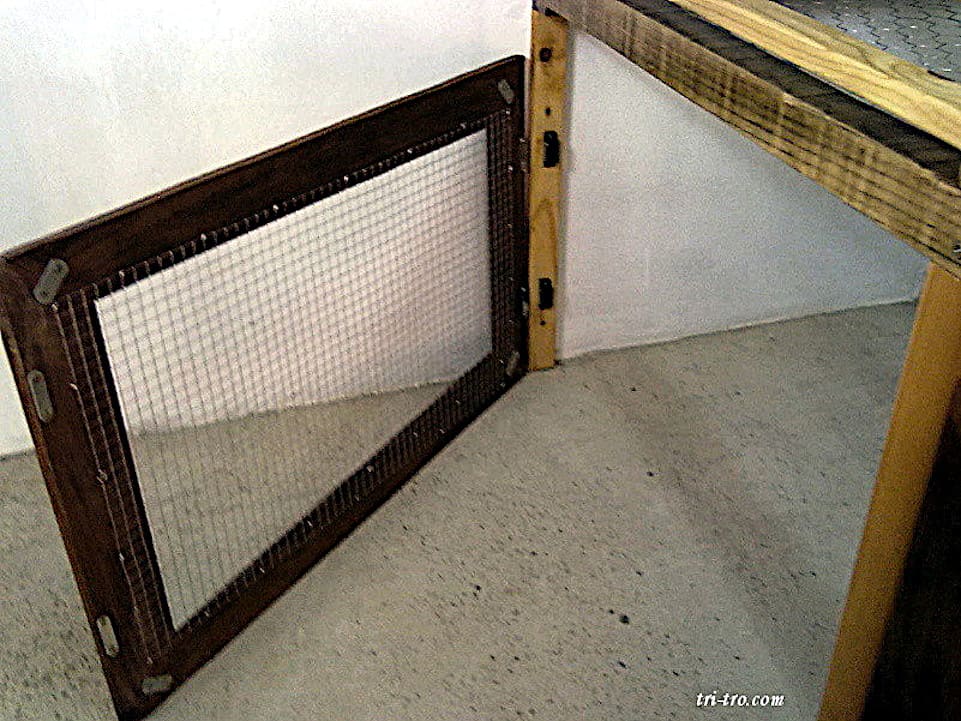
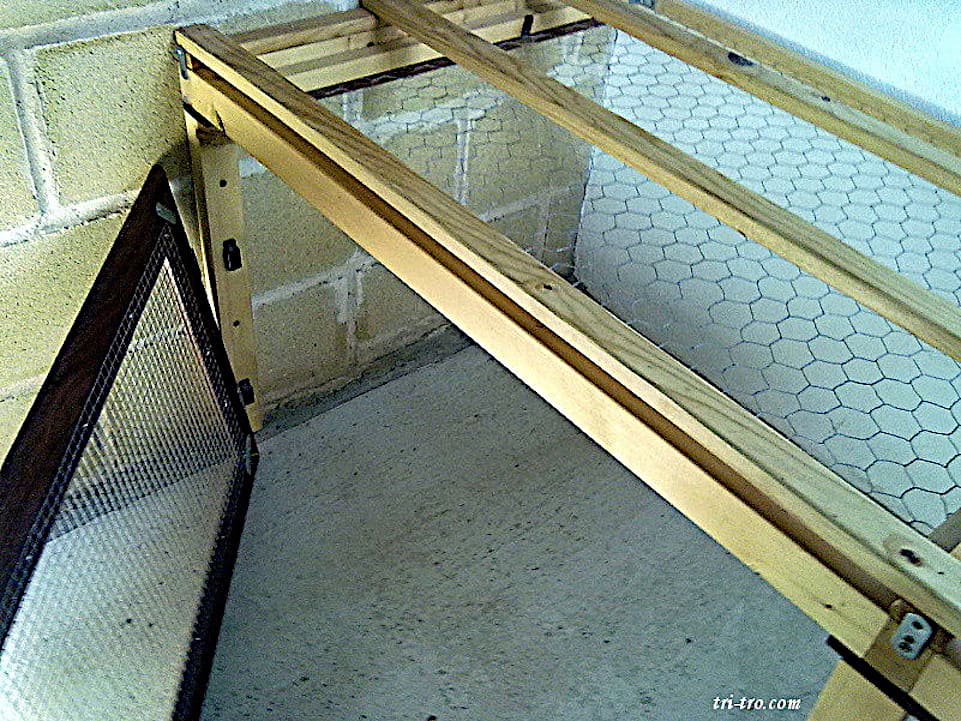
The execution of this project depends on the area or dimensions available. I have adjusted the measurements to the chicken coop, using one of the walls of the same for its creation.
One of the modifications that I have implemented is the use of magnets in place of latches to secure the two front panels, thus facilitating their removal for cleaning of excrement. In addition, one of these can be used as a hatchery for a baby, placing a wood panel or fiber on the top to prevent them from getting dirty.
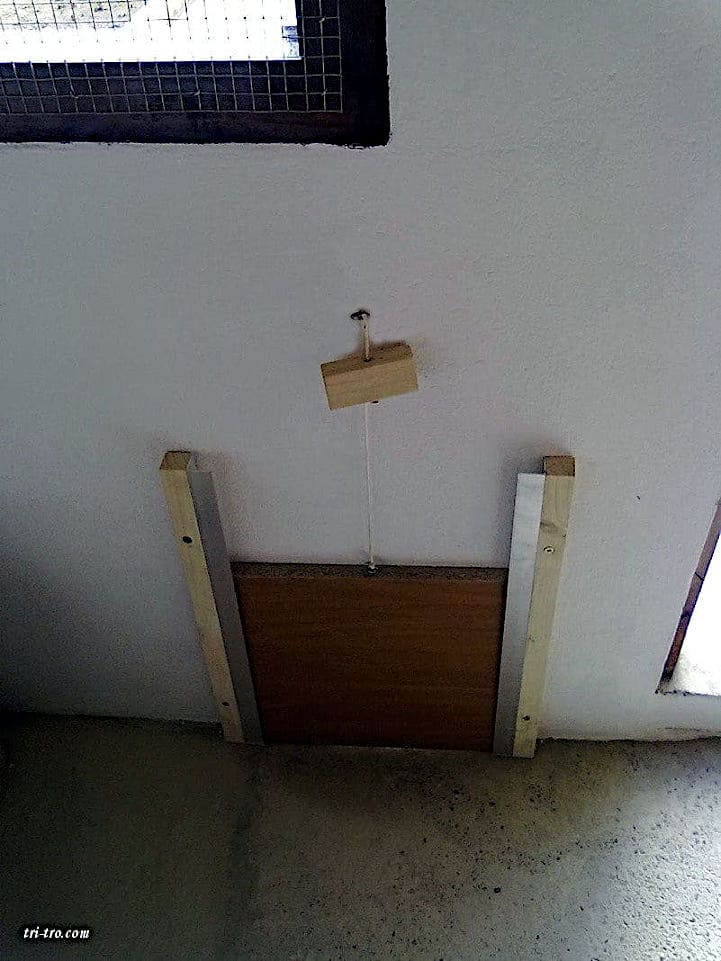
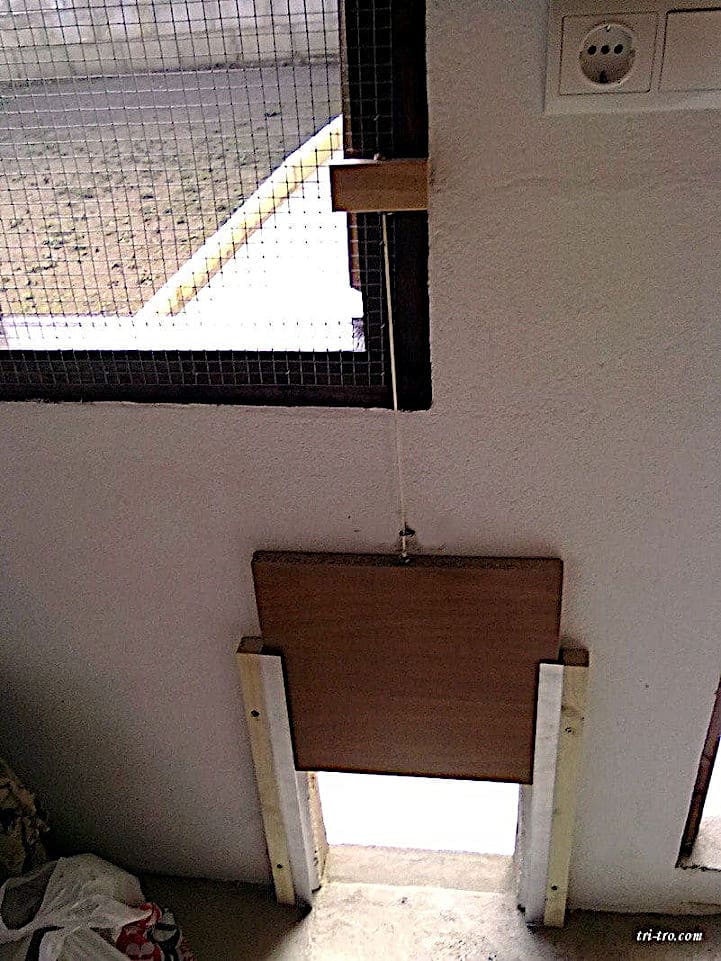
The construction of the gate it is extremely simple, as it only requires two guides in L shape made of aluminum. These are to be fixed to a wooden support that should be of the appropriate dimensions according to our needs. Once everything is assembled, we will fix it in the wall using two anchors and their corresponding screws, making sure that it is level or plumb bob to ensure a perfect finish. Subsequently, we will cut the table that will serve as a trap for the space to allow access to the patio of our hens.
In terms of the table that will work as a gateway, at the time of the court, we must reduce the width by 0.5 cm on each side. For example, if the opening between the rails of aluminum is 35 cm, the wood should be cut to 34 cm This reduction will ensure a correct slide to go up and down the rails of aluminum.
Finally, we have to put a lag bolt closed on an edge of the table, which will serve to attach one rope; on the opposite end, we will use a piece of wood or other material that will be useful to keep the cover in raised position by another lag bolt open, which prevents its descent.
This lag bolt open will be installed at the end of the process; we raised the trapdoor and determine the ideal location where the rope should be hung to hold the hatch in place, ensuring that our chickens have enough space to exit. It is a rather straightforward procedure.
You may be interested in these other sections